
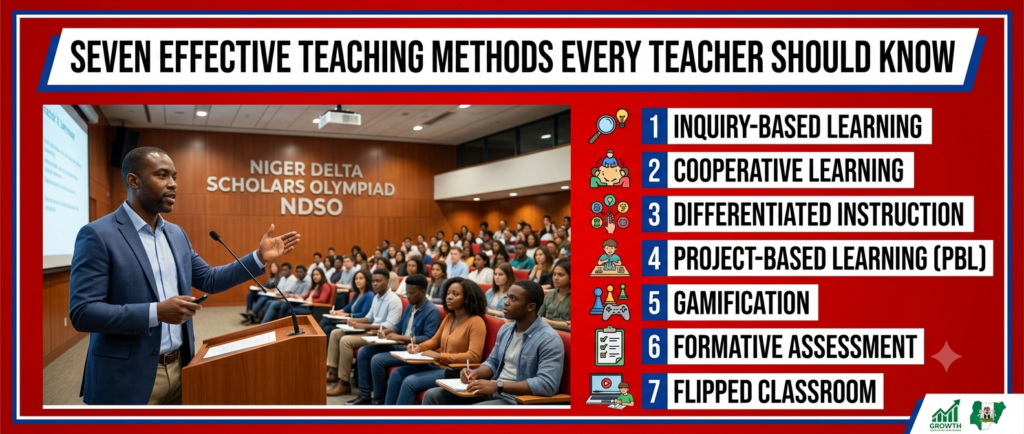
Teaching is more than standing before a classroom and explaining a topic. A truly effective teacher understands that students learn in different ways. Some learn best by listening, some by seeing, some by doing, and others by discussing and discovering ideas for themselves.
For this reason, every teacher should understand and know how to use different teaching methods. Using only one method repeatedly can make lessons boring and may leave many learners behind.
An excellent teacher knows what method to use, when to use it, and how to combine different methods to achieve the best learning outcomes.
Below are seven effective teaching methods every teacher should know and apply in the classroom.
1. THE LECTURE METHOD
What Is the Lecture Method?
The lecture method is one of the most common methods of teaching. In this method, the teacher explains a topic directly to the students while they listen, observe, take notes, and ask questions where necessary.
This method is particularly useful when introducing a new topic or explaining information that students may find difficult to discover on their own.
Step-by-Step Guide
Step 1: Prepare Your Lesson Thoroughly
Before entering the classroom, the teacher should understand the topic properly.
Prepare:
The lesson objectives
Important points to explain
Relevant examples
Teaching materials
Questions for students
Step 2: Introduce the Topic
Begin with something that captures students’ attention.
You can:
Ask a question
Tell a short story
Give a practical example
Connect the topic to everyday life
Step 3: Explain Clearly
Present the lesson in simple and understandable language.
Avoid unnecessary big words, especially when teaching younger learners.
Step 4: Use Examples
Students understand better when they can connect lessons to real-life situations.
For example, when teaching percentages, relate the lesson to money, discounts, examinations, or shopping.
Step 5: Ask Questions During the Lesson
Do not speak continuously without checking whether students understand.
Ask questions such as:
Can anyone explain this?
What do you think will happen?
Can you give another example?
Step 6: Summarise the Main Points
At the end of the lesson, briefly review what has been taught.
Step 7: Evaluate Learning
Give students exercises, questions, or a short test.
Best Use of the Lecture Method
The lecture method is effective for:
Introducing new topics
Explaining difficult concepts
Teaching large classes
Giving background information
2. THE DISCUSSION METHOD
What Is the Discussion Method?
The discussion method allows students and teachers to exchange ideas about a particular topic.
Instead of the teacher doing all the talking, students actively participate by answering questions, expressing opinions, and listening to the views of others.
Step-by-Step Guide
Step 1: Choose a Suitable Topic
Select a topic that can encourage different ideas and opinions.
Step 2: Introduce the Topic Clearly
Explain what students are expected to discuss.
Step 3: Ask Thought-Provoking Questions
Ask questions that require more than “Yes” or “No” answers.
For example:
Why do you think this happened?
What would you do in this situation?
What are the advantages and disadvantages?
Step 4: Encourage Participation
Give different students opportunities to speak.
Do not allow only a few confident students to dominate the discussion.
Step 5: Guide the Discussion
The teacher should ensure that students remain focused on the topic.
Step 6: Correct Wrong Ideas Politely
Do not embarrass students for giving incorrect answers.
Instead, guide them toward the correct understanding.
Step 7: Summarise the Discussion
At the end, highlight the important lessons and conclusions.
Benefits
The discussion method helps students to:
Think critically
Speak confidently
Listen to others
Develop communication skills
Understand different perspectives
3. THE DEMONSTRATION METHOD
What Is the Demonstration Method?
The demonstration method involves showing students how something is done.
The teacher performs an activity while students observe and later practise what they have learned.
This method follows a simple principle:
“Show them, explain it, and let them practise it.”
Step-by-Step Guide
Step 1: Explain the Objective
Tell students what they are going to learn.
Step 2: Prepare the Necessary Materials
Ensure that all equipment and materials are ready before the lesson begins.
Step 3: Demonstrate the Activity
Perform the activity slowly and clearly.
Step 4: Explain Each Step
Tell students what you are doing and why you are doing it.
Step 5: Allow Students to Observe
Give students the opportunity to watch carefully.
Step 6: Allow Students to Practise
Students learn better when they perform the activity themselves.
Step 7: Correct Mistakes
Observe students and provide guidance where necessary.
Best Subjects for Demonstration
This method is highly effective in:
Science
Mathematics
Computer studies
Technical subjects
Agriculture
Home Economics
Practical skills
4. THE QUESTION-AND-ANSWER METHOD
What Is the Question-and-Answer Method?
This method involves the teacher using carefully prepared questions to guide students toward understanding a topic.
Questions help the teacher discover what students already know and whether they understand the lesson.
Step-by-Step Guide
Step 1: Begin With Simple Questions
Start with questions based on students’ previous knowledge.
Step 2: Move From Simple to Difficult Questions
Gradually increase the level of difficulty.
Step 3: Give Students Time to Think
Do not always expect immediate answers.
Allow students time to process the question.
Step 4: Encourage Different Students
Ask questions across the classroom.
Avoid calling only the same students repeatedly.
Step 5: Appreciate Good Attempts
Encourage students who try, even when their answers are not completely correct.
Step 6: Explain Correct Answers
Use incorrect answers as opportunities for teaching.
Step 7: Use Questions for Assessment
At the end of the lesson, ask questions to determine whether learning has taken place.
Benefits
This method:
Keeps students attentive
Encourages participation
Develops thinking skills
Helps teachers assess understanding
5. THE GROUP WORK AND COLLABORATIVE METHOD
What Is Group Learning?
Group learning involves dividing students into small groups to work together on a task, assignment, project, or problem.
Students learn not only from the teacher but also from one another.
Step-by-Step Guide
Step 1: Divide Students Into Groups
Create manageable groups with a reasonable number of students.
Step 2: Give Clear Instructions
Every group must understand exactly what they are expected to do.
Step 3: Assign Responsibilities
Students can have different roles such as:
Group leader
Secretary
Reporter
Timekeeper
Step 4: Provide the Learning Task
Give every group a problem, question, activity, or project.
Step 5: Monitor the Groups
Move around the classroom and observe their work.
Step 6: Allow Groups to Present
Each group should present its findings or answers.
Step 7: Give Feedback
Correct mistakes and appreciate good work.
Benefits
Group work teaches students:
Cooperation
Leadership
Communication
Problem-solving
Respect for others
6. THE PROBLEM-SOLVING METHOD
What Is the Problem-Solving Method?
The problem-solving method encourages students to think independently and find solutions to problems.
Instead of giving students every answer immediately, the teacher presents a challenge and guides them toward discovering the solution.
Step-by-Step Guide
Step 1: Identify the Problem
Present students with a clear problem.
Step 2: Help Students Understand the Problem
Make sure they understand what is being asked.
Step 3: Encourage Students to Suggest Solutions
Allow students to think and contribute ideas.
Step 4: Examine Different Solutions
Discuss the strengths and weaknesses of different ideas.
Step 5: Choose the Best Solution
Guide students toward the most suitable answer.
Step 6: Apply the Solution
Where possible, allow students to test their solution.
Step 7: Evaluate the Result
Discuss whether the solution worked and what could be improved.
Benefits
The problem-solving method develops:
Critical thinking
Creativity
Independence
Decision-making
Confidence
7. THE ACTIVITY-BASED AND EXPERIENTIAL LEARNING METHOD
What Is Activity-Based Learning?
Activity-based learning allows students to learn by actively participating in meaningful activities.
Students may learn through:
Experiments
Projects
Games
Role-playing
Field activities
Practical exercises
Simulations
The principle is simple:
Students often remember more when they actively do what they are learning.
Step-by-Step Guide
Step 1: Identify the Learning Objective
Decide exactly what students should learn from the activity.
Step 2: Choose a Suitable Activity
The activity must relate directly to the lesson.
Step 3: Explain the Instructions
Students must understand what to do and the expected outcome.
Step 4: Provide Materials
Prepare all necessary resources.
Step 5: Allow Students to Participate
Give students the opportunity to actively perform the activity.
Step 6: Observe and Guide
The teacher should monitor students and provide assistance where necessary.
Step 7: Reflect on the Learning
After the activity, ask students:
What did you learn?
What did you discover?
How does this relate to the topic?
Benefits
Activity-based learning:
Makes learning enjoyable
Increases student participation
Improves memory
Develops practical skills
Connects theory with real life
HOW TO CHOOSE THE RIGHT TEACHING METHOD
A wise teacher should not use the same teaching method for every lesson.
Before choosing a method, consider:
1. The Age of the Learners
Young children may require more activities, games, pictures, and demonstrations.
2. The Subject
Practical subjects may require demonstrations and activities, while some theoretical topics may require lectures and discussions.
3. The Size of the Class
Large classes may require different strategies from small classes.
4. The Learning Objective
Ask yourself:
What exactly do I want my students to know, understand, or do after this lesson?
5. Available Resources
Choose methods that can work effectively with the materials available.
THE BEST APPROACH: COMBINE DIFFERENT METHODS
The most effective teachers do not depend entirely on one teaching method.
For example, a teacher can:
Introduce the lesson using the lecture method.
Ask questions using the question-and-answer method.
Demonstrate the concept.
Allow students to discuss in groups.
Give them a problem to solve.
Allow them to perform an activity.
Evaluate their understanding.
This combination makes the classroom more interesting, interactive, and effective.
FINAL ADVICE TO EVERY TEACHER
A great teacher is not simply someone who knows a subject. A great teacher is someone who knows how to help students learn.
Every teacher should continue improving their teaching skills, studying their students, trying new approaches, and evaluating the results.
Remember:
Teaching is not complete because the teacher has explained the lesson. Teaching is successful when the students have understood, learned, and can apply what they have been taught.
THE SEVEN METHODS AT A GLANCE
Lecture Method – Teaching through explanation.
Discussion Method – Learning through the exchange of ideas.
Demonstration Method – Learning by watching how something is done.
Question-and-Answer Method – Learning through guided questioning.
Group Work Method – Learning through collaboration.
Problem-Solving Method – Learning by finding solutions.
Activity-Based Learning – Learning by doin
g and experiencing.
A GREAT TEACHER DOES NOT JUST TEACH LESSONS—A GREAT TEACHER INSPIRES LEARNING, BUILDS CONFIDENCE, AND PREPARES STUDENTS FOR THE FUTURE.